• Skip to primary navigation
  • Skip to main content
  • Skip to primary sidebar
Science Fair Projects

Science Fair Projects

Free Science Fair Projects for school students

  • Science Projects
  • Chemistry Projects
  • Physics Projects
  • ISEF Science Fair

ScienceProjects

Water Science Project

December 16, 2022 by ScienceProjects

Water Science Project


Water Science Project Intro

There are various water science projects to surprise. Many children love experimenting with water because it is easier than other elements. Catch an ice cube, rising water, rainbow creations, and many others. You will find a long list of experiments for the 4th to 9th graders to showcase. Teachers expect exciting projects from students. And the water science project has endless possibilities. Moreover, it is freely available. This liquid is almost a requirement for all science experiments. It is also a reason why it is one of the popular picks.

Water Science Project

Ice Cube Catch

Every kid loves to play throw and catch. So, catching an ice cube with water is a fun way to teach children some scientific facts. You will need a bowl of cold water, a string 12-inch size, a few ice cubes, and salt. Let an ice cube float inside the bowl of cold water. Use one end of the string to place over the ice cube and attach the other to the bowl. Pour salt over the ice cube, and don’t be shy. The string will freeze, sticking to the ice cube. It is a nice catch.

Rising Water

The rising water experiment is an easy project for the kids. You can use food color for more elaboration of water vapors. So, the student learns better about rising water. You will require a plate, a glass, a candle, something to light the candle, water, and sticky dough. Place the candle over the plate attached to the dough to the plate. Therefore, the candle will not fall. Pour over some water on the plate. And cover the candle with a glass over the plate. If you mix food color with the water added, it will show colored water vapor.

Water Leakage

This experiment tests if cold water leaks more quicker than hot water. It is also one of the easiest science projects for up to 9th graders. Use two paper cups. Make a tiny hole with a pin at the center of the bottom. Fill one cup with hot water and the other with cold water. Use the same amount of water and record the total time for drainage. This experiment shows that the molecules that are tightly packed have less flexibility. So, the ice-cold water will drain slowly. And the hot water molecules move faster, being further to each other.

Water Can Walk

The walking water experiment can help students understand how water can move from a filled container to an empty one. Use three glasses, two hand towels, water, and food colors. You will require two different types of diluted food colors. Fold the towels. Fill two glasses with water, half a glass or more. Add the food color and mix well.

Place each towel inside the glass till it touches the bottom. However, keep the towels as far away from each other as possible. Place the other end of the towel inside an empty glass. Wait for a few hours. The water will walk from a filled glass to an empty one via the towel. You will see the towels’ color change.

How do different things mix with water?

For this water science project, you can use any substance to mix with water. Take as many substances as you like and combine these with water to see the results. To test this theory, you can use sugar, salt, baking soda, oil, butter, and other compounds. You can also mix a single substance with either cold or hot water. And see how mixing it with hot and cold water differentiates.

Filed Under: Chemistry Projects, Science Projects Tagged With: Chemistry Projects, Science Projects

Stem Fair Project Ideas

December 16, 2022 by ScienceProjects

Stem Fair Project Ideas


Stem Fair Project Ideas Intro

A day comes when your 8th-grade student has brought home an assignment vital to their tutor. The job is a science fair project or  Stem Fair Project Ideas and interests a lot of work. The student must follow the teacher’s schooling to ensure their project meets the needed standards. Now you have to think of the stem fair project ideas. These can involve any science, technology, engineering, or mathematics experiments.

Stem Fair Project Ideas

Though it may sound easy, selecting the one for showcasing is hard. The reason is that other kids may come up with the same idea. And your child may have to find a new one. Here is a list of some of the best and easy stem science fair project ideas.

  1. Check Lungs Capacity

It is one of the easiest stem fair projects for the 8th graders or below. The materials you need are a balloon and a measuring tape. Inhal as much air as you can and exhale all the air into the balloon. Measure the size of the balloon with the measuring tape. That is how much air your lungs can breathe in.

  1. Create a Better Lightbulb

To make a lightbulb, you should create one with a jar, a wire, and a 6-volt battery. Then, you can experiment with different materials. To make a lightbulb that lasts longer burns brighter or is powered by an alternative source.

  1. Test How Stress Affects Body Temperature

Another easy stem fair project idea any student can perform. Conduct this experiment using a thermometer, stopwatch, and a few volunteers. Assign simple and easy puzzles or mathematical challenges to the volunteers. So, first, record the body temperature of a volunteer with the thermometer. Then let the challenge begin. Use the stopwatch for 5-10mins. Stop the timer, and record the resulting rise or drop in the body temperature. Compare the effects of different level tasks on the body temp of the volunteers.

  1. Can a Carbonated Drink Affect Meat?

Scientists tested the hypothesis that soda can digest meat as our stomachs do. They covered a meat container with different sodas and observed how the meat changed over time. The data showed that the meat did digest better with soda than with other liquids. You can use any three different types of meat for this experiment. Store each meat with two or more soda drinks in three separate bowls. Leave it for 30-40mins. And see how the carbonated drink affects the meat, fish, beef, chicken, etc.

  1. Robotic Hand Designing

It is a project you can change and improve with as much creativity as possible. Using any material, you can make the robotic hand model with your own ideas. With a hand that can pick up a ball or plucks up a piece of string, there are many prospects. The aim is to show a robotic hand that works under your control. Children also love this project because it is creative, and they can use toys like Lego, blocks, etc.

  1. Newton’s Cradle

Building a Newton’s Cradle at home is easy. However, it will shock the 8th grader’s classmates as a difficult-to-make project. All you need to do is tie strings in a triangular shape with a button, marble, or small ball hanging. You can explore various images available on Google as a reference. You can create the platform using cardboard, hardboard, or softwood. So, each time you throw a marble or small ball, it will move the others with the same momentum, repeating various times.

  1. Blocking Sun UV Rays

It is one of the easiest stem fair project ideas. Use color-changing UV beads to test the protection of pill bottles, hats, clothing, and more. It is an 8th-grade science experiment with almost endless possibilities.

  1. Create a Cup Holder

Can your 8th-grade science investigator make a sturdy block that can hold two glasses of water with any material? The answer is yes, and it takes only 5 minutes. This limited-time challenge pushes the limits of their creative engineering. They can use straws, plastic, disposable glasses, sticks, cardboard, etc. All you have to do is to balance the two glasses holding some water.

  1. Water Test

Testing water quality is interesting and a great learning experience for the student. Use any water testing kit for this experiment to determine the TDS levels. You can also use the tap water supplied to your home. So the kid can check for you the water grade.

  1. Create a Spring Scale

It is one of the easy DIY stem fair projects/part of Stem Fair Project Ideas with a lot of creative potential for the students. Use Hooke’s Law to see if a spring that stretches can measure any object’s weight. The material is simple, but you need patience and physics to calibrate the spring and use it for weight testing.


Filed Under: Chemistry Projects, Science Projects Tagged With: Chemistry Projects, Science Projects

Skittles Science Fair Project

December 15, 2022 by ScienceProjects

Skittles Science Fair Project


Skittles Science Fair Project Intro

The skittles science fair project will surely be a hit because everyone loves the candy. You can enjoy the scraps, and the colorful experiment boards will be a hit with your classmates. This science experiment is easy. You can spare some skittles, and it will keep your child amused for a while. The water molecules in warm water dissolve faster than in cold water. When the water molecules come into contact with the sugar in the candy, they cause it to dissolve faster. So, what materials do you require, and how to perform it?

Skittles Science Fair Project

What do you need to do?

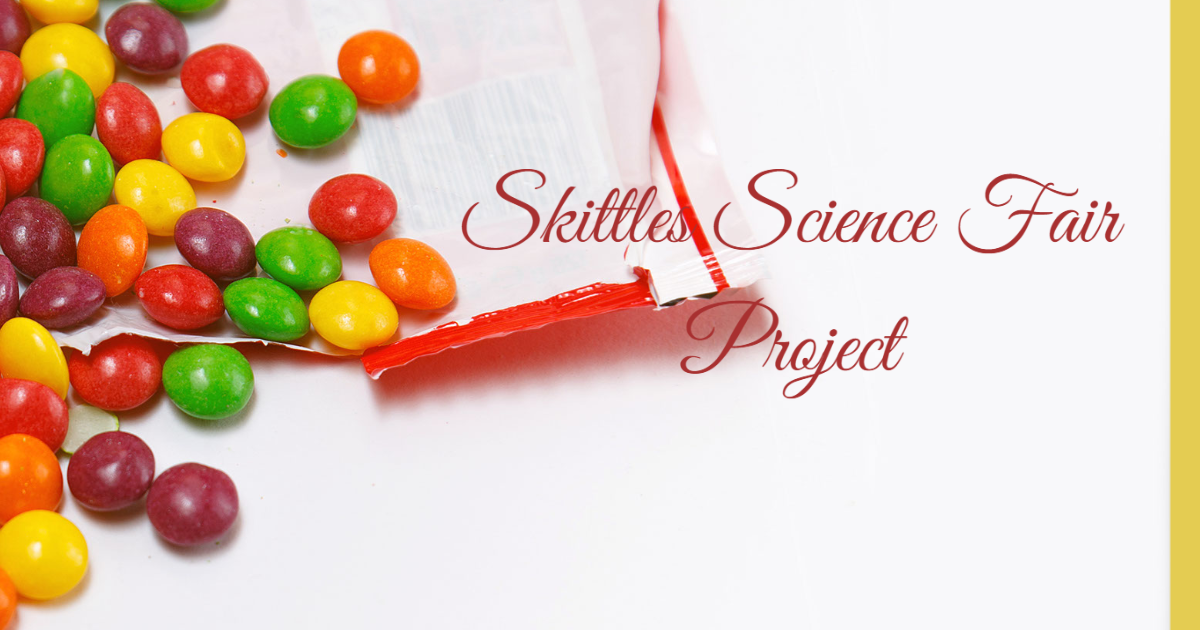
You will need a pack of skittles. Also, you require 1/4th cup of cold water, warm water, and two white plates. First, arrange the skittles in a single-row colored pattern around the edge of the white plate. Pour over enough cold water to cover all the skittles and the container. On the second plate, pour the warm water over the candy. Watch a rainbow creating a whirl of colors over the second plate with warm water. Also, you can observe if anything happens to the first plate filled with cold water. However, it is one experiment. There is more that you can do with this candy.

Other Skittles Science Fair Projects

There are more experiments that you can perform with this exciting candy. So get the mouth-watering packets ready. However, could you not eat it yet? First, try out these exciting tests with your learner.

Test which liquid can dissolve the color faster

It is an easy-to-perform experiment with our favorite candy. Select the liquids you want to try out. These can be any ones you choose. Make sure to write down your predictions about the results. Which one will dissolve the color quicker? Bleach will dissolve it faster, or will the vinegar be the winner? You can also make a chart for the types of liquids, skittle colors, and rank. You require cups, a pen, a notebook, a camera to take pictures, liquids, a stopwatch, and skittles. You can also note down the time it takes. You can try various solutions: lemon juice, vinegar, or alcohol.

Skittles for density column

This skittles science fair project is exciting because you will have a rainbow color glass at the end. The experiment is for teaching children about the density of a dissolvent. Therefore, the liquid or solution mixed with the most things has the most density and mass. It will sink because it is heavier. Use cups or testing tubes to fill with the same color skittles. Place yellow color ones in the same, and purple ones in another. However, use different quantities.

Take twelve purple candies in one cup or tube and seven yellow in another, for example. Mix these with two tablespoons of water. Pour the purple one into a glass, and carefully pour the yellow over it. The yellow color candies have less density and are lighter. So, the yellow one will float over the purple. Do the same with more colors, and use less quantity to create a rainbow each time.

How many same-colored skittles are there in a bag?

It is an interesting skittles science fair project. All you have to do is to fill transparent containers with the same color skittles. Record the number and keep it to yourself. And ask your classmates or friends about the number of candies inside. Record the results from each individual on a paper. The students can make a bar chart, pie chart, or bar graph. Did anyone guess the right number? Which color skittles was thought to be in more quantity? You can ask so many questions with this experiment.

Filed Under: Chemistry Projects, Science Projects Tagged With: Chemistry Projects, Science Projects

Gummy Bear Science Project

December 14, 2022 by ScienceProjects

Gummy Bear Science Project Intro

The magical gummy bear science project is an easy and fun experiment for children up to 12 years old. Setup will take less than an hour, but the experiment will last at least 48 hours. Most sweet candies dissolve in water. However, gummy bears are made with gelatin. It prevents the bear from dissolving. This experiment is a fantastic way to introduce kids to the osmosis process. Osmosis is the process that makes the water move from one concentration level to another. The water can move from a higher concentration to a lower concentrated water. So, can the gummy bears? Try this experiment with your kid, and the results will surprise you.

Gummy Bear Science Project

What is Osmosis?

Here’s the definition of osmosis according to the books. Osmosis is the movement of water molecules. These molecules move from one solution with a high concentration of water molecules. The movement is across the semipermeable membrane of a cell to a solution. The ending result is the movement towards the solution with a lower concentration of water molecules.

How does the gummy bear science project work?

Gummy bears dissolve in water. But when they are cooled, the water inside them is taken out. It leaves behind a solid candy bear. Gelatin is a long string of molecules that twist together to create a tangible form. The water moves into the gummy bear through osmosis as soon as you insert the gummy bear inside. So, the water molecules pass via the gummy bear’s cells and dissolve its components.

When salt is added to water, there are more salt molecules in the solution than water molecules. It causes the water molecules to move toward the salt molecules. And the salt and water molecules in the solution even out. It is why a gummy bear in salt water doesn’t grow as much as one in sugar water.

The Materials You Require

You will need the following materials to perform the gummy bear science project.

  • Gummy Bears
  • Three glasses of water
  • One tablespoon of salt
  • One tablespoon of sugar
  • Ruler
  • Calculator
  • Kitchen scale
  • Paper towels
  • Pen and paper
  • Clock or timer

Instructions for Gummy Bear Science Project

First, choose any three gummy bears of the same color. Measure each gummy bear’s length, height, and width and write it down. Weigh each gummy bear and write down its weight. You have to label each glass with its related contents. Like, water, salt water, or sugar water. Fill the glass-tagged water with one-half cup of plain water. Load the glass with a label of salt water with one and a half cups. Mix in by adding one tablespoon of salt until it has disbanded. Now, fill the glass that is labeled sugar water with 1.5 cups of water.

Now you need to add and mix a single tablespoon of sugar until all the sugar has dissolved. Add a gummy bear to each glass. Record the time. Wait for twelve hours, and measure and weigh all gummy bears. Return the gummy bears to their respective glasses. Check back after 24 hours. Now, measure and consider the weight of each gummy bear again. Once again, return the gummy bears to their containers. After 48 hours, measure and weigh each gummy bear.

How will it work in other liquids?

So, now the students know what happens to the gummy bears in an adhesive bear science project. Now it is time to test this theory with different liquid types. These can be milk, vinegar, or vegetable oil. You will need to repeat the steps and use the same materials as instructed. Labeling the glasses is vital. Each time, weigh the bear, return it to its corresponding liquid type, and repeat. It is a fun way to teach youngsters about osmosis.

Filed Under: Chemistry Projects, Science Projects Tagged With: Chemistry Projects, Science Projects

Cool Science Fair Projects

December 12, 2022 by ScienceProjects

Cool Science Fair Projects


Cool Science Fair Projects Intro

If you’re planning to do cool Science Fair Projects this year, use more than just a light bulb and a 6-volt battery. There are lots of other great ideas or cool Science Fair Projects out there. Many projects are suitable for distinct grades based on your curiosity. The eighth grade is a great time to start working on your science fair project. We’ve gathered some cool science fair projects you can try in the classroom. Teachers can find ideas, too, with hands-on activities and experiments that kids can do. These activities will help kids learn about science and the world around them.

1. Citric Acid and Baking Soda Volcano

You can use lemon and baking soda for this experiment. Take a large size lemon and cut it from the top. You can use any food color to lay over the lemon. Throw the baking soda and wait for the chemical reaction with the lemon’s citric acid. The result is a colored volcanic eruption. It is colored because you used the food color.

Cool Science Fair Projects

2. Shine the pennies

If you are looking for an easy-to-do, cool science fair project, shining the pennies is the one. You can soak dirty and tarnished pennies in different acids (vinegar, salsa, lime juice, and lemon juice). See which ones shine the most. Take notes on which acid worked best to make the pennies shiny.

3. Explore density with salt

This lava lamp experiment is a fun way for kids to learn about the density of liquids. You can use materials that you have right in your kitchen to do this experiment. These are water, glass, salt, food coloring, and vegetable oil. Fill the clear glass with water, 2/3 portion. Now pour some vegetable oil and see what happens. It will float over water. Pour a few drops of food color. Sprinkle sale and wait for the results.

4. Rainbow Rubber Eggs

Place an egg dipped in vinegar in a glass or jar and pour a few drops of food color. Wait for a few days, 4-5 days. It will turn into a rubber ball-type material. The egg will bounce and feel like rubber. However, it can break if you exert more force on it or throw it at the wall. This experiment is one of the cool science fair projects that are easy to do. Nevertheless very exciting.

5. Magical Rollback Cans

This cool science fair project sheds light on physics concepts. It is the difference between kinetic energy and potential. Use a coffee can or any other soft drink can. Make a hole at the top and the bottom with a nail. Tape a rubber band at the top of a nut. Open the paper clip and hook it onto the rubber band. Thread the rubber band through the bottom hole and secure it with a paper clip. You can use a pencil to stretch and hold a rubber band. Thread the rubberband through the hole in the lid and secure it with a paper clip. Roll the can on the floor, and it will roll back.

6. Density Tower

The concept is to layer different types of dense liquids over each other. Fill the jars with different liquids to see what happens. For example, pour water into a glass. Then pour honey over it, then vegetable oil, and so on. All the liquids will form layers according to their density. You can create two or three jars to show up at the science fair.

7. Magic Magnets

The magic of magnets never stops to excite students. So, you will require three or four magnets. Using wooden sticks, you can create a platform to hang a circular object attracted to a magnet with a string. Place two or more magnets under this object and see the result. You can also use a single magnet to move around the object.

8. Lemon Battery Power

You can make a battery with five or six large-size lemons. It will be surprising for other students to find out about this. Surely, they missed this cool science experiment. You will need copper wires, lemons, galvanized nails, alligator clips, a voltmeter, and wire cutters. Place copper wire and nails in the lemons and measure voltage. Roll the copper wire on the galvanized nails and use it for each lemon. Join all the lemons together using the copper wires attached to the nails. Check the voltmeter for a surprise.

9. Epsom Salt Crystals

You will require Epsom salt, a jar, water, food coloring, a measuring cup, and a spoon. Pour a cup of Epsom salt into the jar. Add a cup of hot water. Stir for one to two minutes until the salt dissolves. You can add food color if you want to. Mix well with the color. Drop a few grains of sand into the jar. Leave it inside the fridge overnight. It is how you can grow Epsom salt crystals for cool science fair project.

Filed Under: Science Projects Tagged With: Science Projects

Science Fair Board : A Guide to the Board

August 28, 2022 by ScienceProjects

Science Fair Board: A Guide to the Board


A Science Fair Board is a display board, generally of the measurement, of 36 tall by 48 wide, which acts as a display board. It is a three-panel system that unfolds. The design of display boards differs as per the events. Most Science Fairs have transferred their display boards to digital media though there are many who still believe in the conventional ones.

Science Fair Board

Science Fair Display Boards are built with many types of materials and that is solely dependent on how one wishes to portray it. The flashier the board, the more advertised it becomes.

Why do we need a Science Fair Board?

It is a pertinent question that is often asked. Given the rapid transformation of technology and how smartphones have improved mobility, it is perhaps logical to expect, science fair boards to be displayed through apps. However, even in this world of glitz and sophistication, certain things aren’t meant to change. A well-designed science board evokes memories and adds a vibe to a fair. Now to the question of why we need a board, it is a simple argument. It is there to guide visitors and participants. It is also important to understand what disparate purposes it serves by being put up there.

Main boards help visitors identify sectors of the fair while individual project boards talk about the project and its aim and vision.

How to Organize a Science Fair Board?

A science fair board is ideally organized as a newspaper with separate sections allocated for myriad information. Since most of us read from left to right, it is hence imperative that the description of the subject begins from the left top end and ends at the bottom right end. As mentioned previously, Science Fair boards are there to inform, but they just shouldn’t be there as a signpost. There needs to be a sense of purpose while designing it. The Science Fair Board is not just a standing edifice of information but an adage to the fair itself. It must invoke excitement and attraction.

The various section of the board should each resemble a story of its own.

The most common categories are:

  • Abstract
  • Question
  • Hypothesis
  • Variables
  • Background
  • Research

For a board representing a fair:

  • History
  • What to expect
  • Categories of projects
  • Last year’s winners
  • A Map

These are not exhaustive descriptions and more can be added as per the imagination.

Science Fair Board

Fonts: It is extremely important to create texts which are easy to read. The audio-visual aspect of the board decides its fate. They must be large at 22 points or more. If the placement of the board is such that it can be viewed at eye level, then font size-16 is good enough.

Images: A board hanging at a distance would require larger images and larger captions. A board at eye level is allowed to have smaller images and captions

Content: A Science Board is meant to inform and not shock and awe with the language. Hence, the language must be easy to read and understand. While Shakesperean skills are truly superpowers, let us not go overboard out here with it.

Check the Rules

Each fair has its own set of rules and regulations, which must be followed. The committee would perhaps also set stipulations pertaining to science fair boars and project boards and they must be adhered to.

Final Words

A Science Fair board is not just any board but a thought-provoking piece of literature that acts as a force multiplier. It does not simply describe the event or the project but remains a memory to many. Let’s build good memories then.

Filed Under: Science Projects Tagged With: Science Projects

  • Go to page 1
  • Go to page 2
  • Go to page 3
  • Interim pages omitted …
  • Go to page 5
  • Go to Next Page »

Primary Sidebar

Tags

Chemistry Projects Physics Projects Science Projects

Recent Posts

  • Water Science Project
  • Stem Fair Project Ideas
  • Skittles Science Fair Project
  • Gummy Bear Science Project
  • Cool Science Fair Projects


Handcrafted by ProjectsGeek.